
Want to extract and create AI prompts from images?
The DALL-E, Midjourney, and Stable Diffusion artificial intelligence modules simplify creating an image in response to a given prompt.
But what if you want to find a prompt for a particular AI-generated image you like? The internet is full of amazing images, but often, we have no idea which AI prompt was used to generate them.
In this article, we’ll explain how to quickly extract prompts from AI images, whether made by a Stable Diffusion, Midjourney, or any AI image generator. You will learn a simple reverse prompt lookup technique (popularly known as ImagetoPrompt) using a reverse image prompt generator that will make your work a lot easier.
So, let’s get right into our guide.
Method #1: Using Clip Interrogator Colab Notebook to Extract Prompts from Any AI Image
Note
The image does not contain any metadata or other stored data that would allow it to reveal the specific prompts used. However, it will explain how the model perceives the image and tries to replicate it.
The method we will look at is called “reverse prompt lookup.” It works by looking at the uploaded image and guessing the medium and style of art.
It then lists possible prompts that could have been used to make the image.
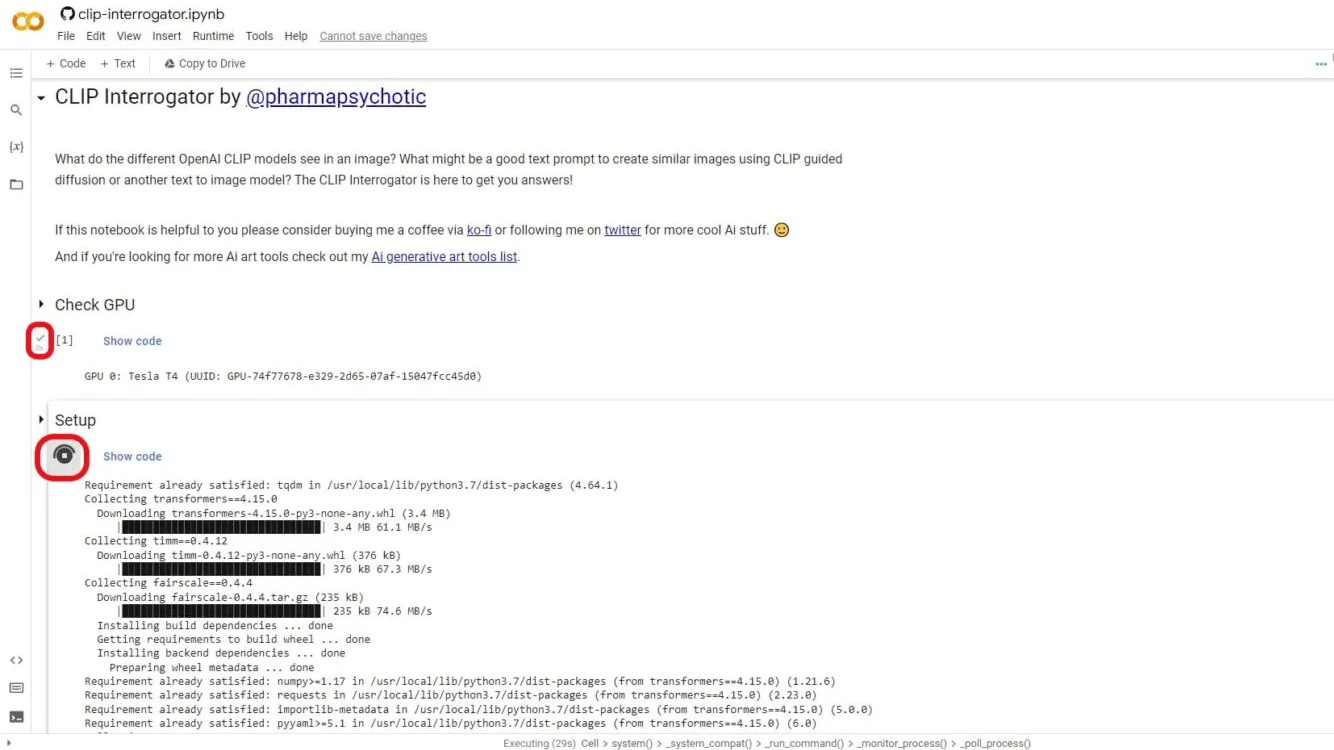
Step 1: Access the Clip Interrogator Colab Notebook Using Your Google Account
Log in to your Google account and open the CLIP Interrogator Colab notebook created by Pharmapsychotics. This notebook is designed to run on Google Colab, eliminating the need for local storage and installation.
Step 2: Run the Cells in The Notebook
Once you have opened the notebook, run the “Check GPU” cell and wait for the green tick.
Then, run the Setup cell.
Step 3: Input Your Image For Which You Want The Prompt
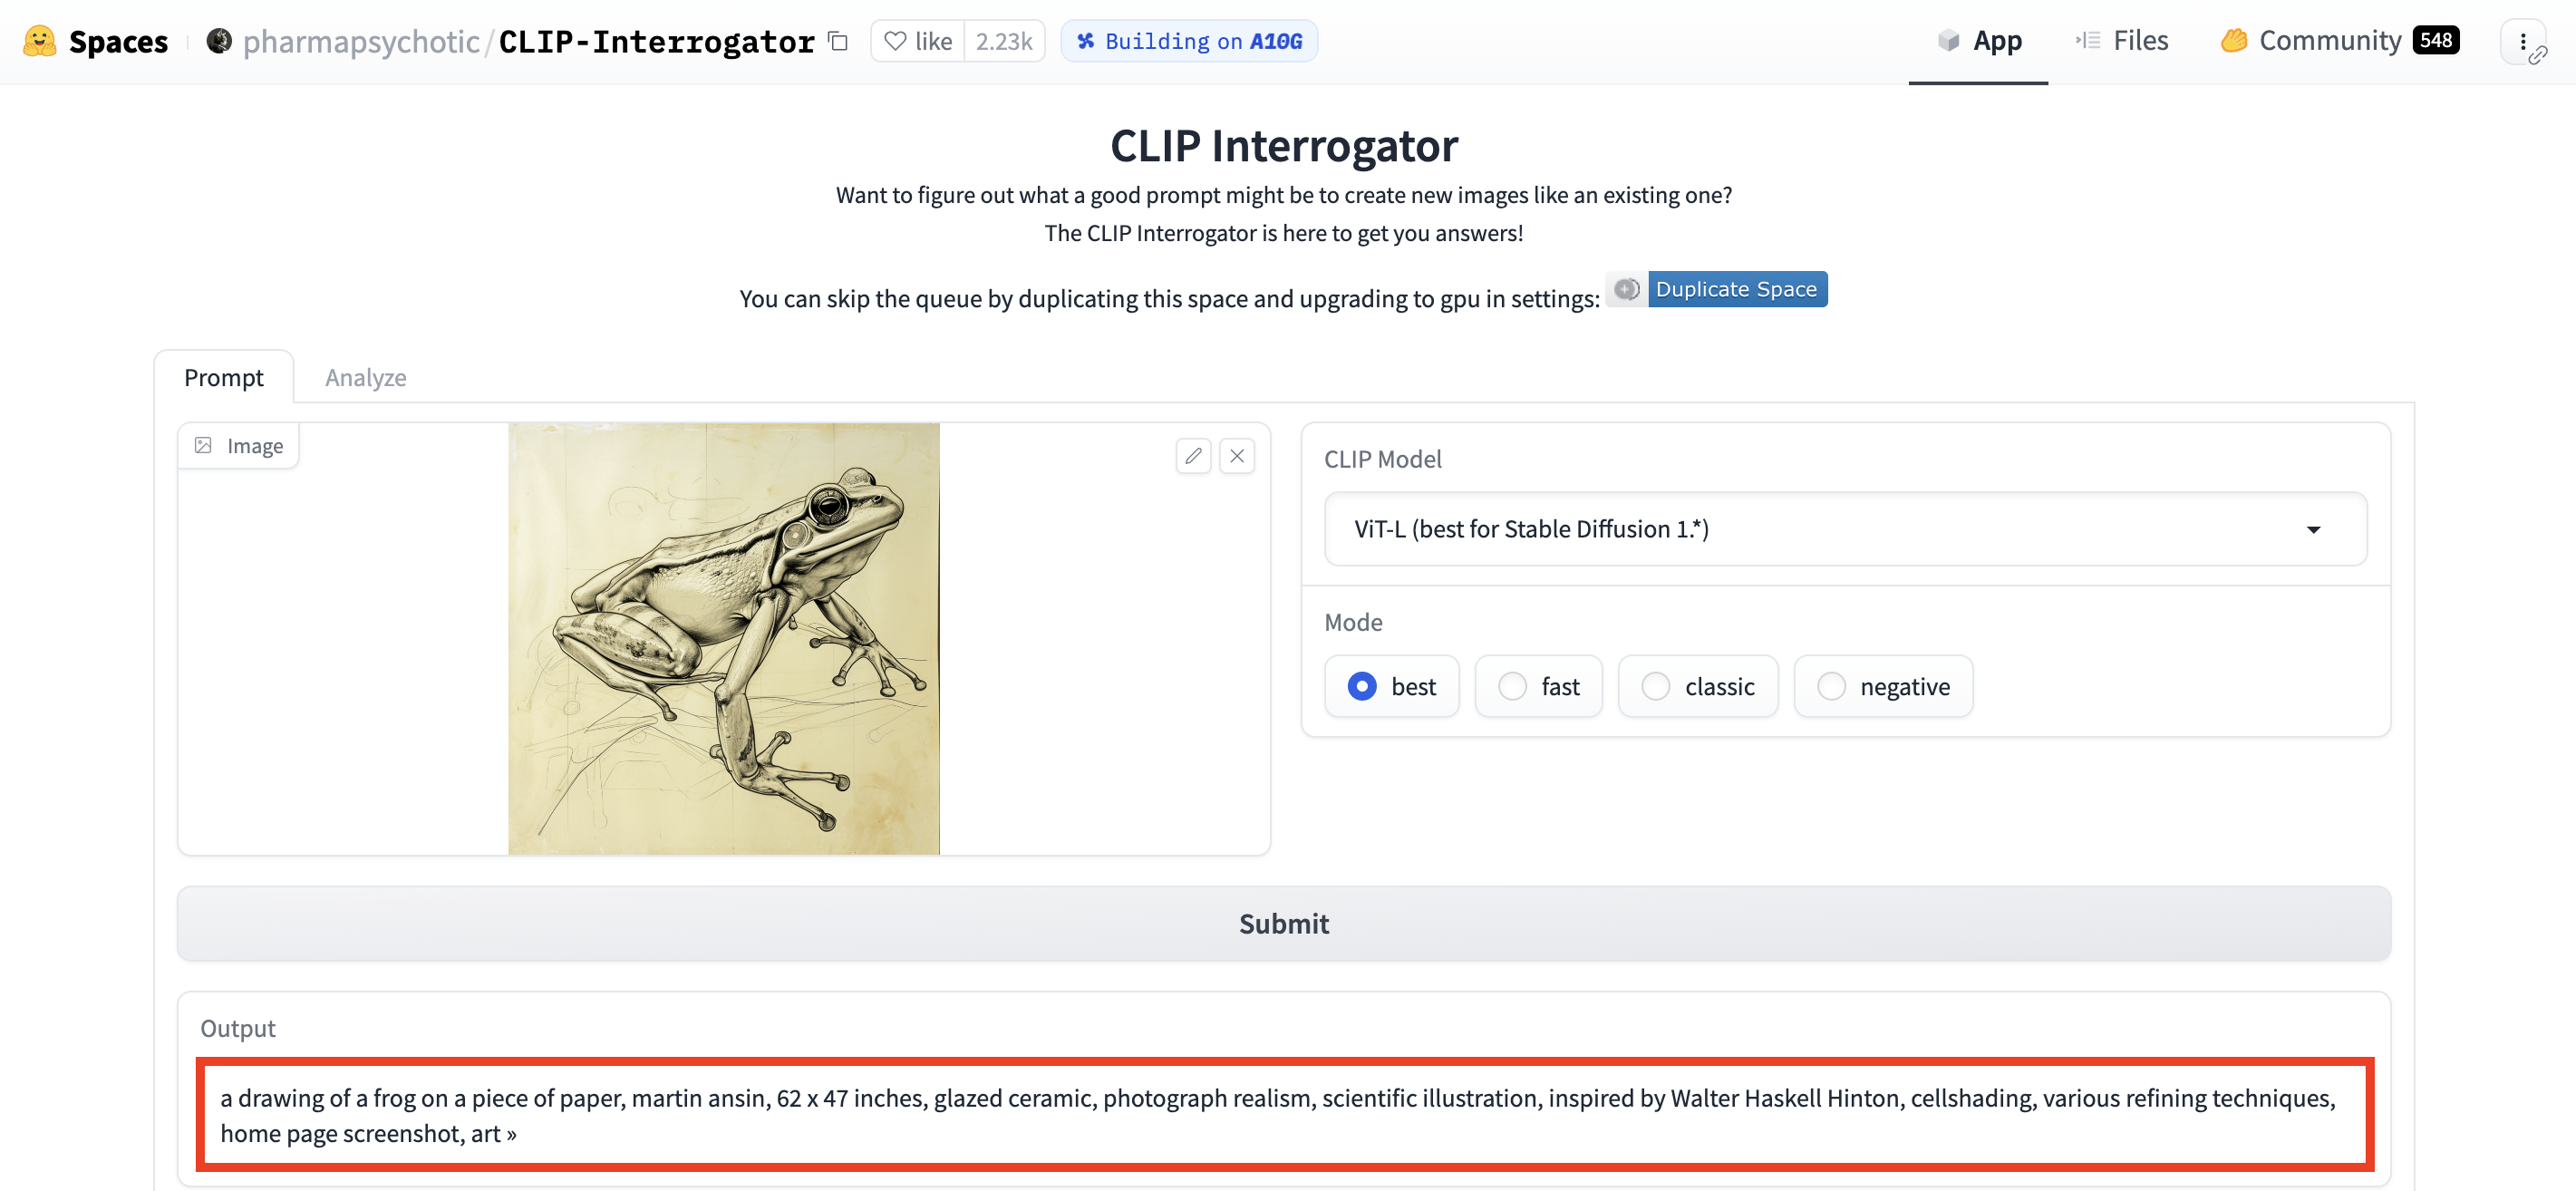
Run the Interrogate cell and replace the existing link with the link of the image you want to reverse lookup or upload it by clicking the “Upload” button. Make sure to use an online link, not a local device path.
BOOM! Your Image Is Ready
Within seconds, the result will be displayed in a table format at the end of the Colab notebook page. Use the “magic stick” to interact and expand the result table.
The table will include medium, artist, trending, and movement details. Ultimately, it will also provide a prompt similar to the image uploaded.
Alternatively, you can use CLIP Interrogator by Hugging Face for easier prompts generations.
If you want a step-by-step video tutorial, check this video below:
Method #2: Use an Online ImagetoPrompt Tool
The above method (#1) is a bit longer method, but there’s a more simpler method that you can use.
Note
This image-to-prompt tool is inaccurate as it predicts the prompt after analyzing the image you provide. It can predict any image even if not generated by an AI tool such as Stable Diffusion, Midjourney, DALL-E, Bing AI Image Creator, and more.
Here are some of the steps to follow:
Step 1: Go to ImagetoPrompt.com
Head to imagetoprompt.com, and you’ll see the home page, which it will prompt you to upload the image you want to extract.
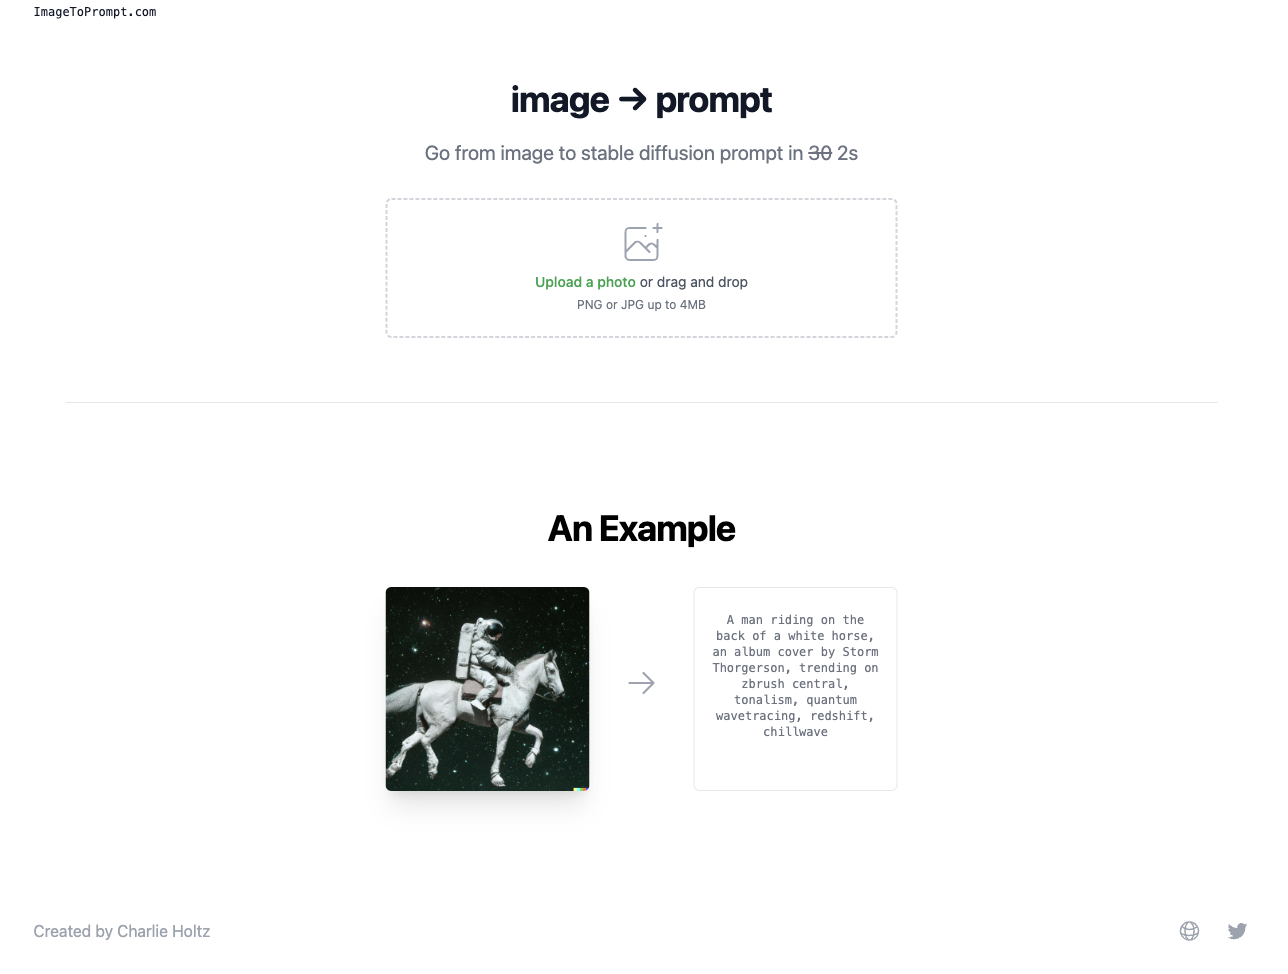
Step 2: Get Your Prompt
After your image is uploaded, wait for 2 seconds, and then the tool will prompt you.
The prompt will not be accurate as it only predicts the closest prompts that might be used to generate that image.
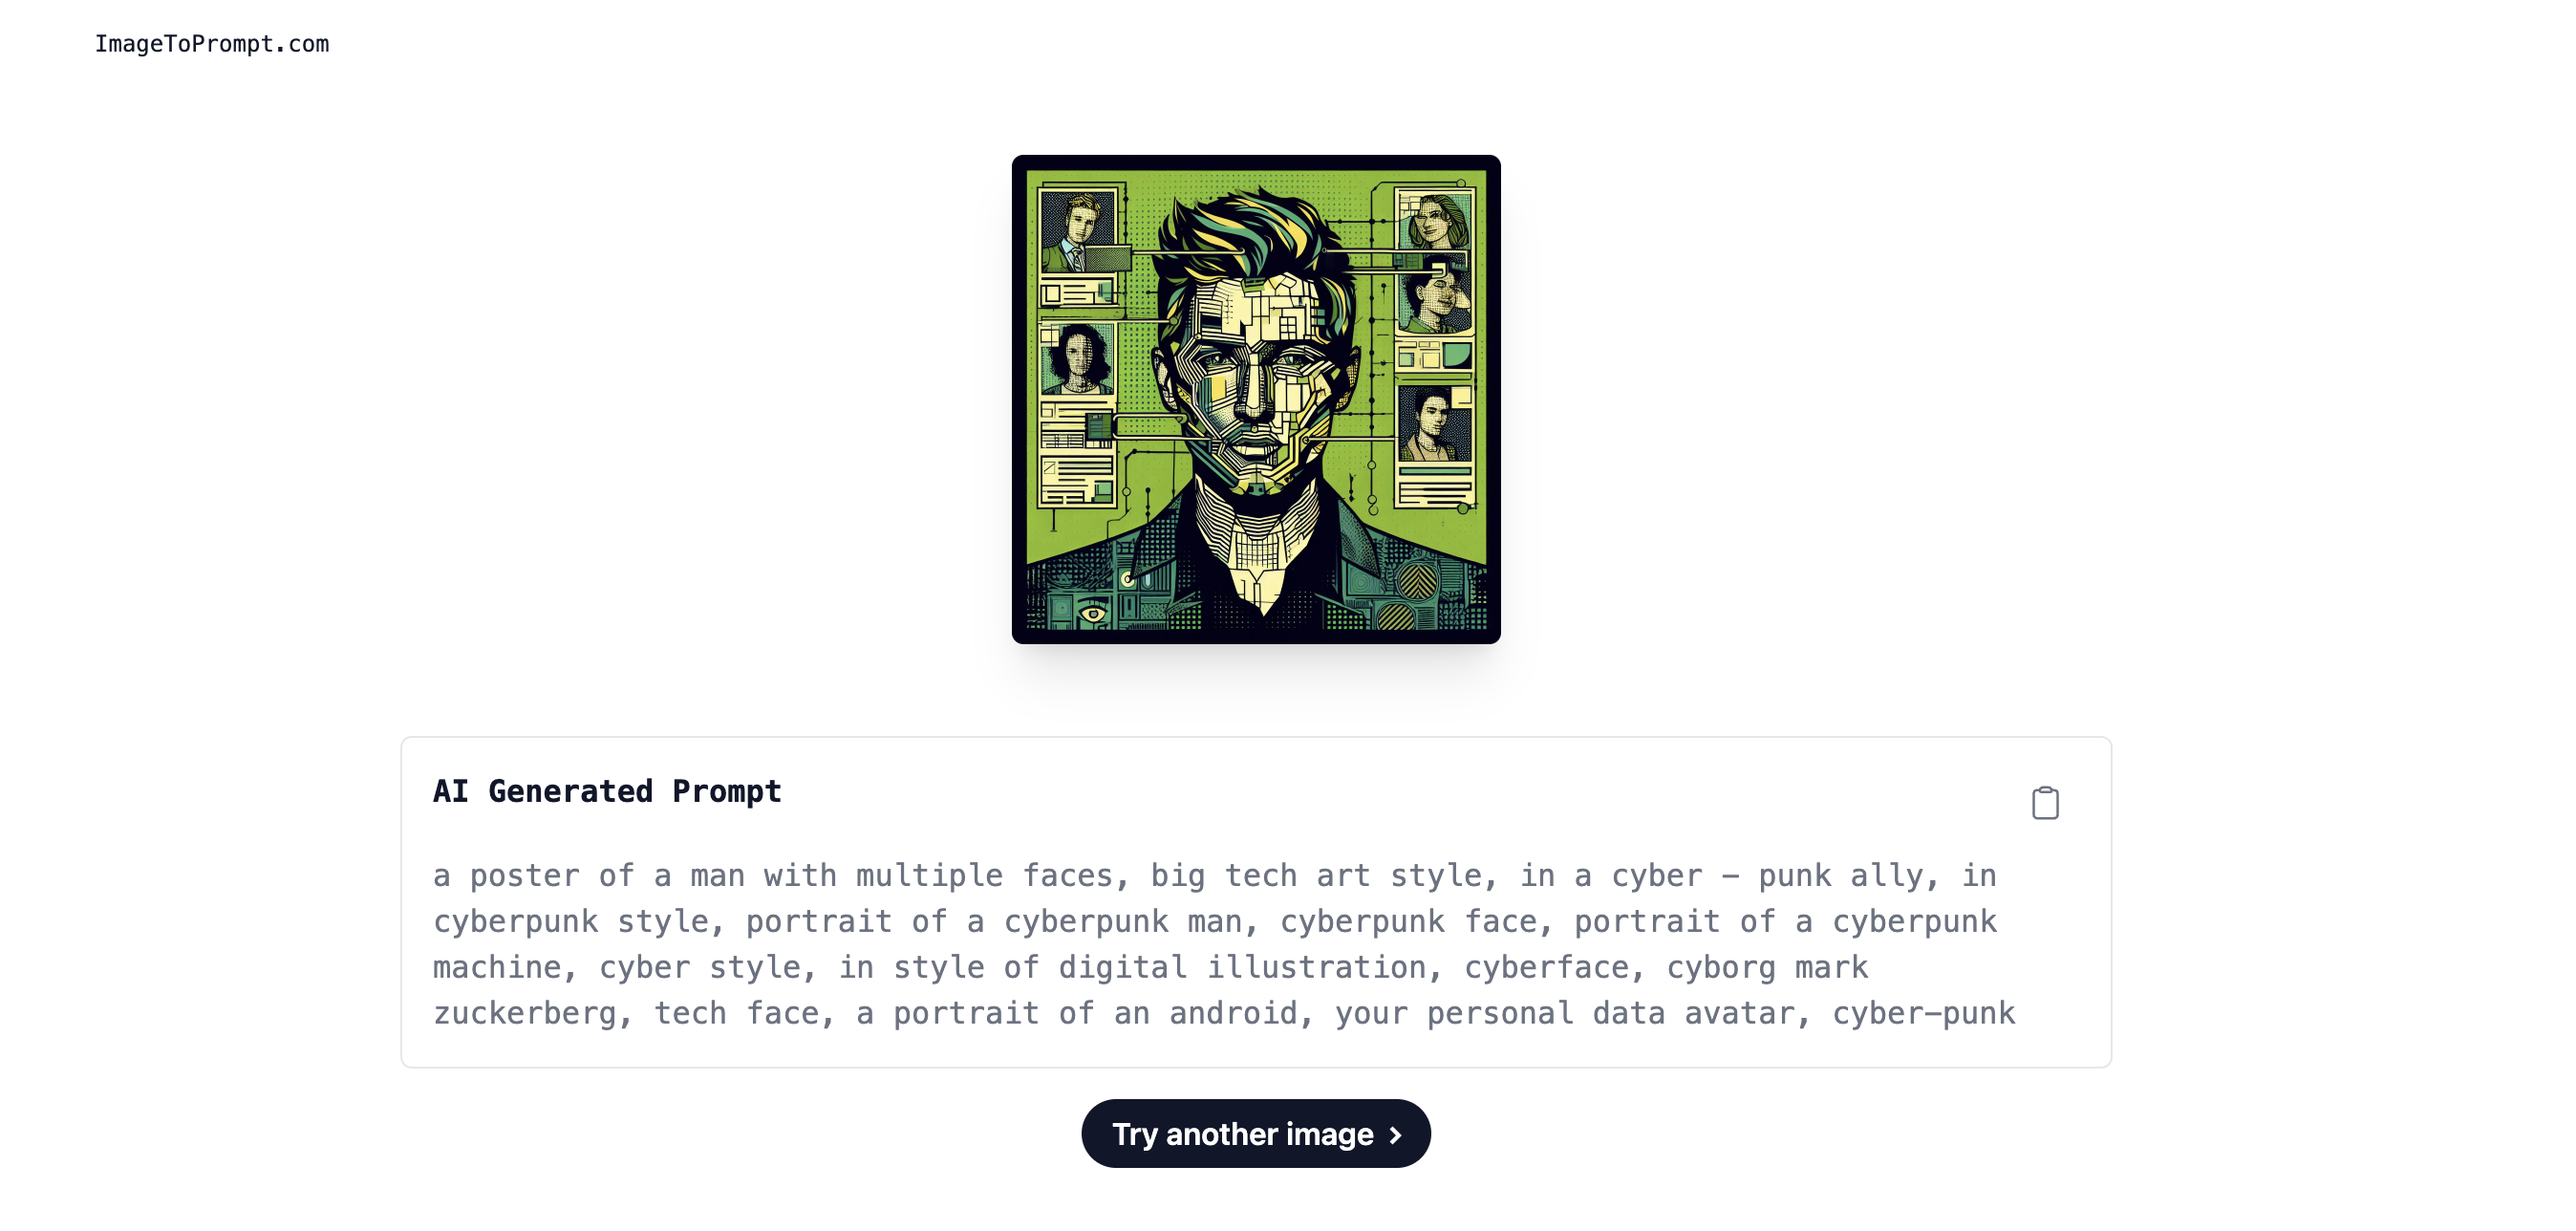
However, it will give you a basic idea of the parameters used.
Method #3: Using Stable Diffusion’s PNG Info
If you are sure that the AI image you want to extract the prompt from was generated using Stable Diffusion, then this method is just for you.
There’s a chance that the PNG Info function in Stable Diffusion might help you find the exact prompt that was used to generate your chosen image.
Follow these steps:
Step 1: Go to Stable Diffusion WebUI
The first step is to open your Stable Diffusuin WebUI (it doesn’t matter if you run diffusion locally or not).
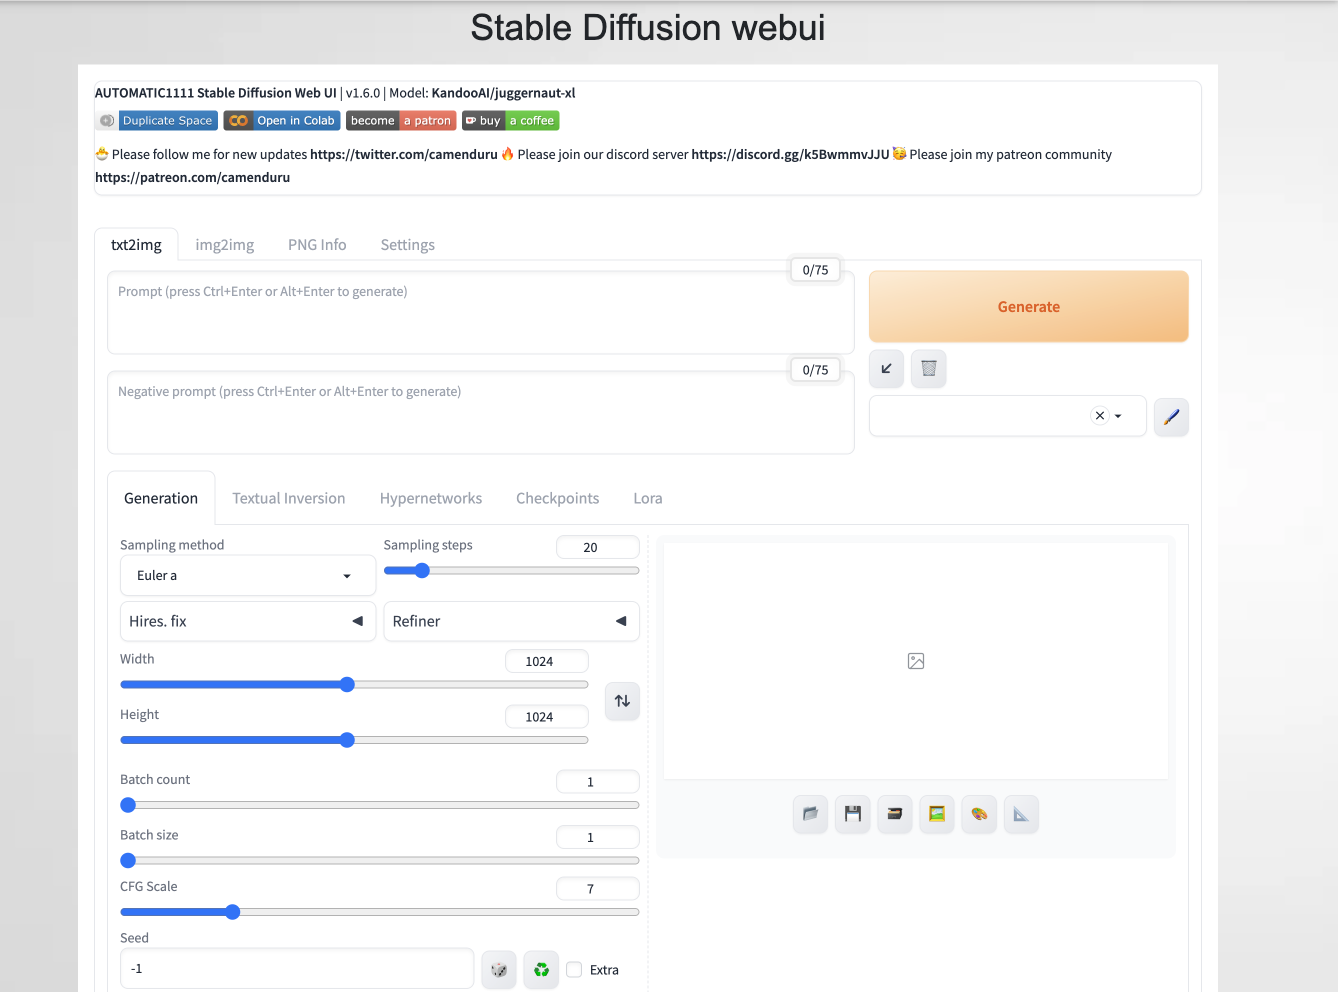
Step 2: Head to PNG Info
Now, click the PNG Info option from the above tab in your Stable Diffusion.
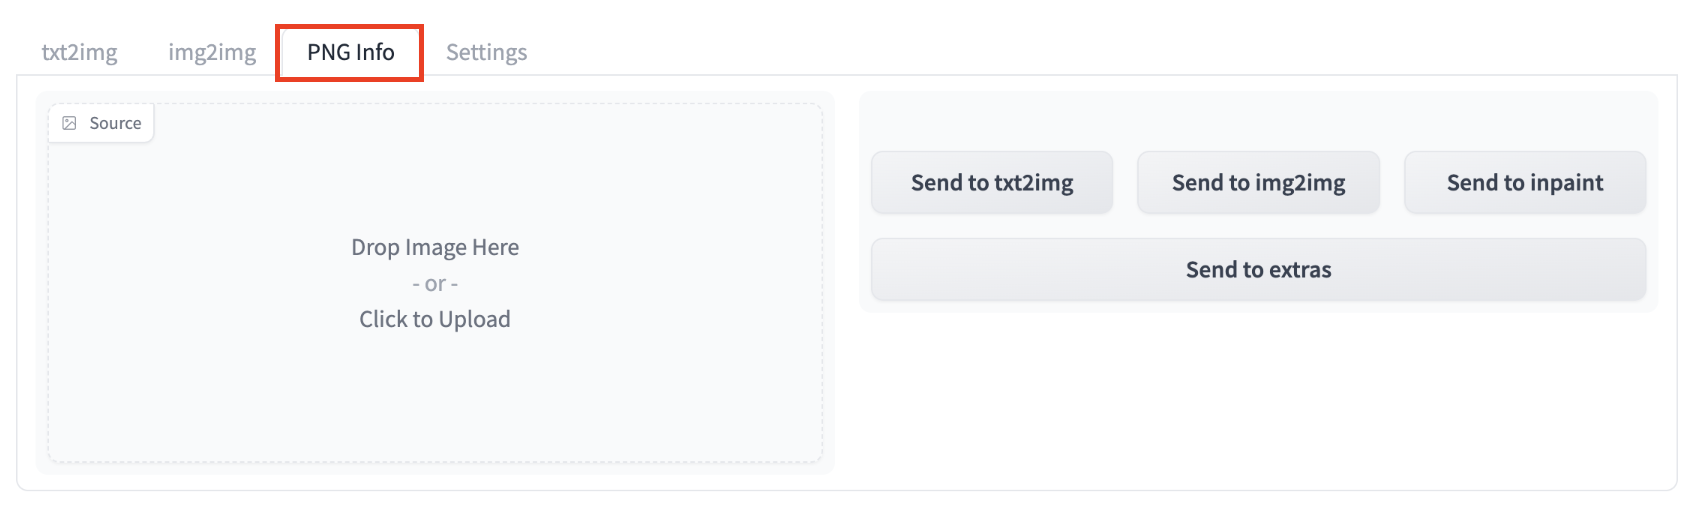
Step 3: Upload the Stable Diffusion Generated Image into The Engine
Now, upload your Stable Diffusion-generated image into the PNG Info tab and wait a few seconds.
After a few seconds, you’ll be able to see every tiny piece of information about the image, and if you notice at the top, you’ll find the exact prompt used.
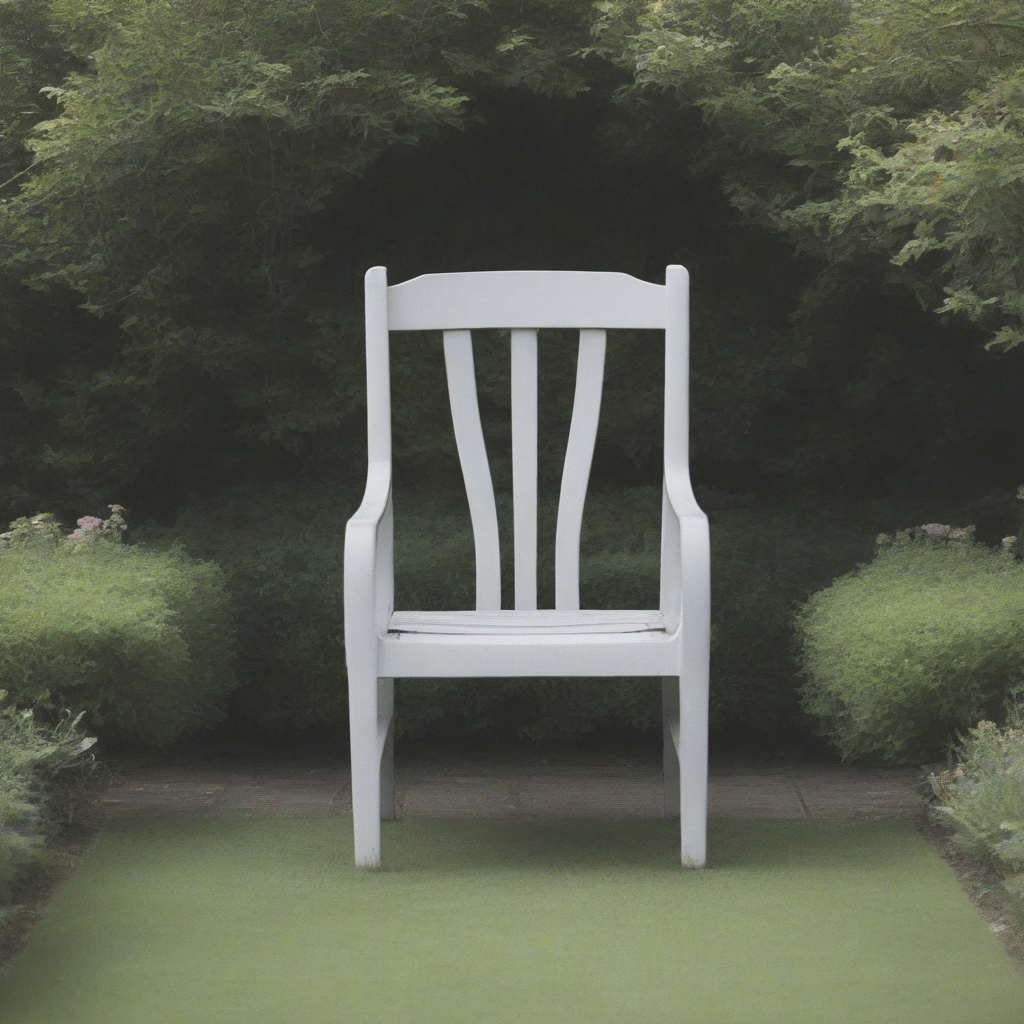
For example, here’s a Stable Diffusion-generated image that we used to find the prompt:
After uploading it into PNG Info, here’s all the data that the WebUI gives us:
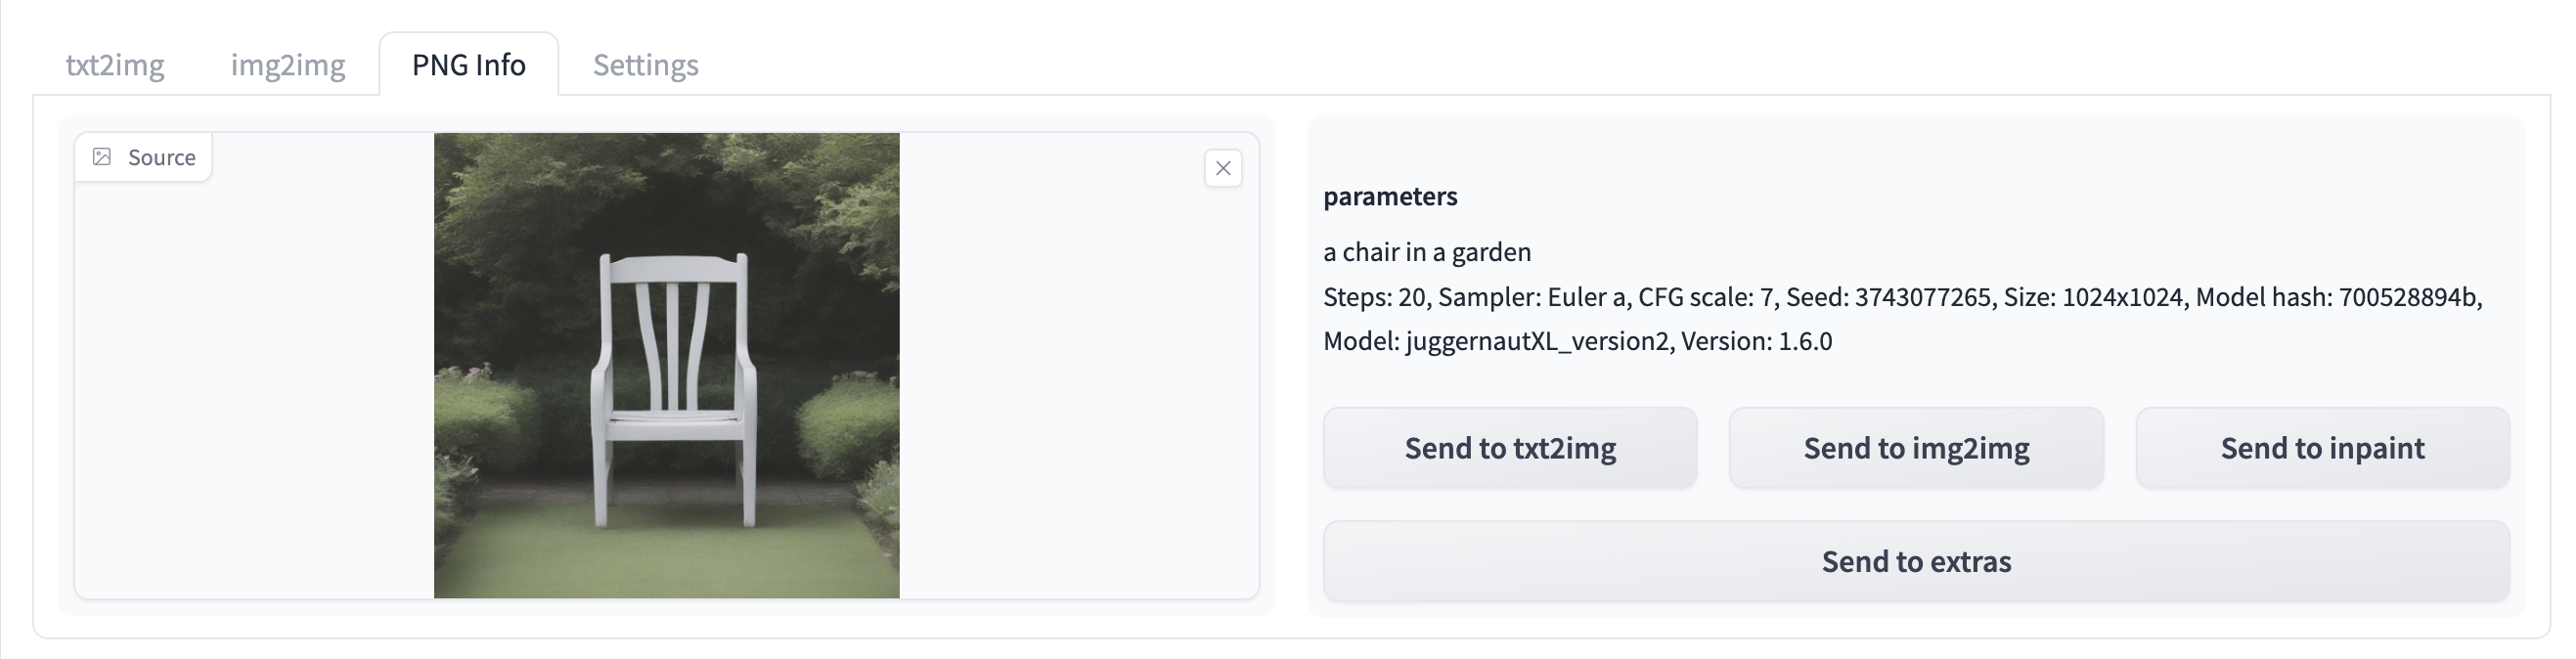
This is the best reverse prompt lookup technique for using Stable Diffusion as an AI image generator.
And that’s it. You can use these methods to find any prompt from any AI image.
Method #4: Using Pincel Tool
There’s another AI tool called Pincel AI that can help you extract and create AI prompts from any AI image.
Just follow these steps to use the tool:
Step 1: Check for Prompt in Metadata
If the image was generated using tools like Stable Diffusion, the prompt might be embedded directly in the image’s metadata. Use Pincel Image Meta Reader to reveal this information.
Upload your image to Pincel, and it will display all the metadata, including the AI prompt if it’s present.
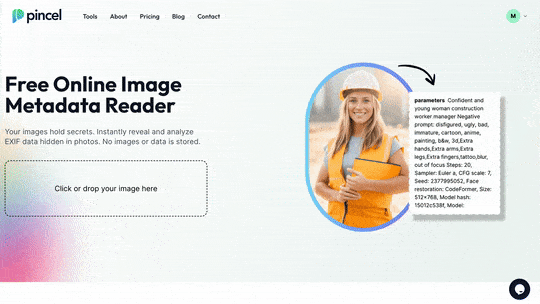
Remember, the metadata might have been stripped if the image has been shared via chat apps, image-uploading websites, or file transfer services.
Step 2: Use Pincel AI Multimedia Chat
If you can’t find a similar image in the Midjourney catalog, the next best option is Pincel AI Multimedia Chat.
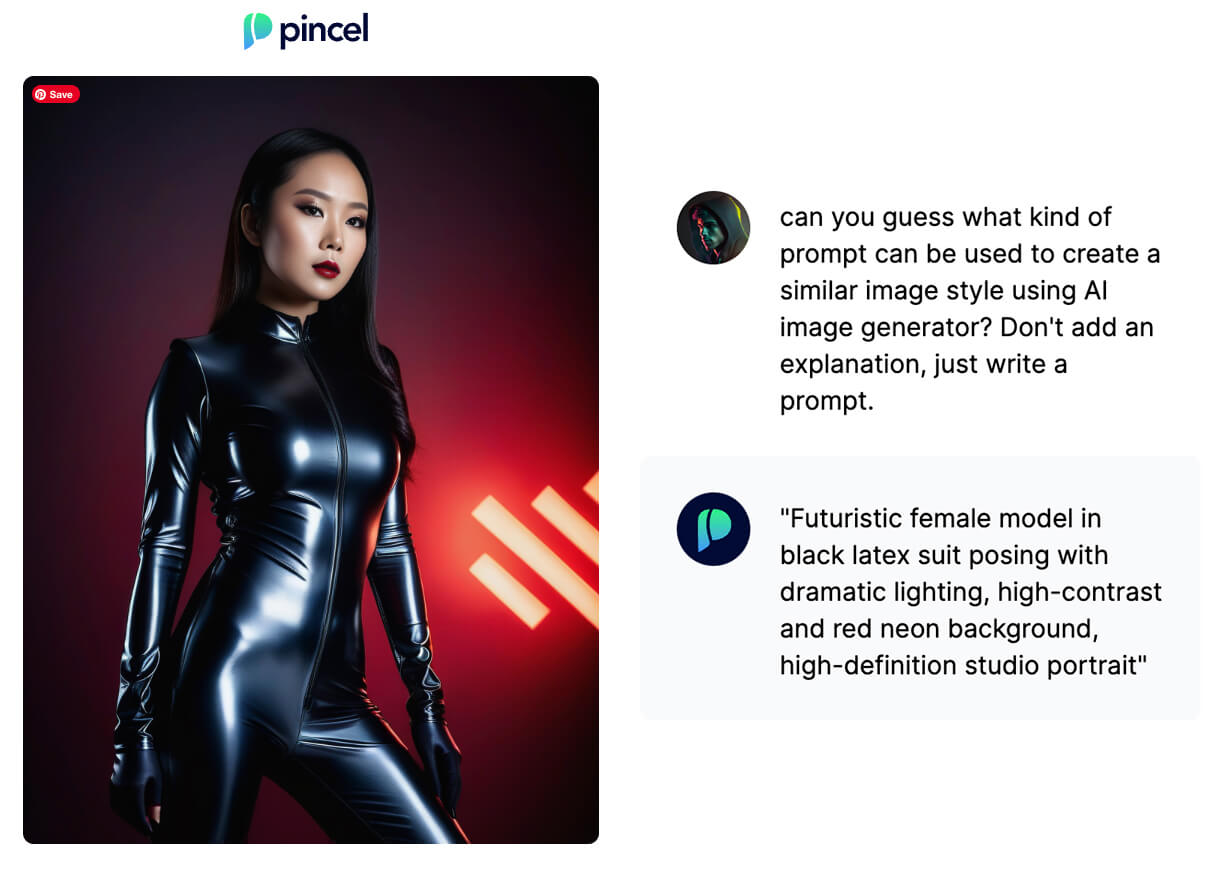
This tool is an AI model trained to understand and describe images. It is familiar with Stable Diffusion’s style.
Upload your image to Pincel AI Multimedia Chat and ask the AI what the prompt might have been.
A suggested short prompt is: “What was the prompt for this image?”
The End!
And that’s it. Using the above four methods, you can easily extract any AI prompt from an image and replicate those images.
We hope this article helped you in answering your queries. If you have more questions, feel free to ask us in the comment section.


How can I use to this best ai website?
Visit this link and then use the steps provided.